Mastering the Light Meter in Manual Mode
The Role of the Light Meter in Helping Your Image
When shooting in Manual Mode, you control ISO, shutter speed, and aperture, and the camera’s light meter becomes a valuable tool to help you achieve the correct exposure. The light meter measures the brightness of the scene and suggests settings to achieve an exposure close to 18% gray—a standard reference tone in photography.
However, scenes with predominantly dark or light tones may mislead the light meter. In these cases, it’s essential to trust your instincts and adjust settings manually.
High-Key and Low-Key Photography

- High-Key Images:
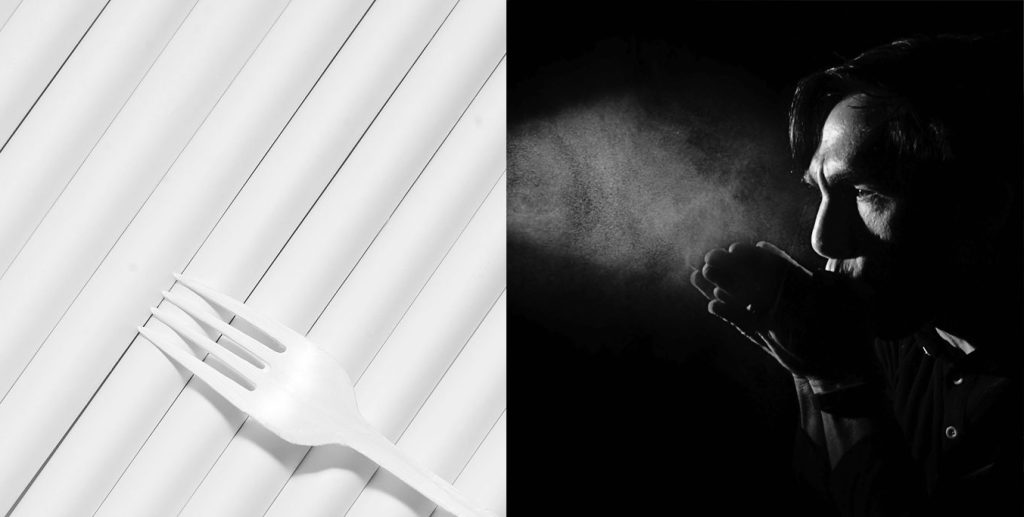
These images are dominated by light tones. For example, when shooting a snowy landscape or a brightly lit portrait, the camera may try to underexpose the scene, as it aims to bring the bright tones closer to the middle gray baseline. In this case, manually increase the exposure to maintain the bright, airy aesthetic of high-key images. - Low-Key Images:
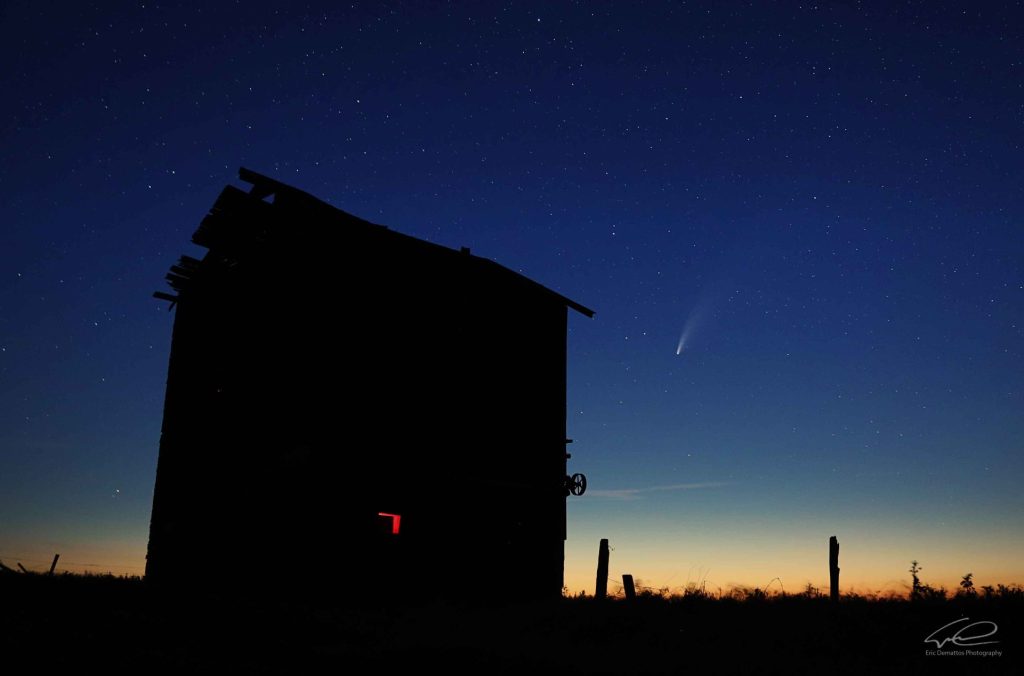
In low-key photography, dark tones dominate the image. Think of a dimly lit portrait or a scene with heavy shadows. The camera will try to brighten the scene, but for a dramatic, moody effect, manually decrease the exposure to keep the dark tones rich and deep.
Both high-key and low-key images can be visually striking and successful, but they require the photographer to ignore the light meter’s guidance and rely on manual adjustments.
Using the Light Meter Scale

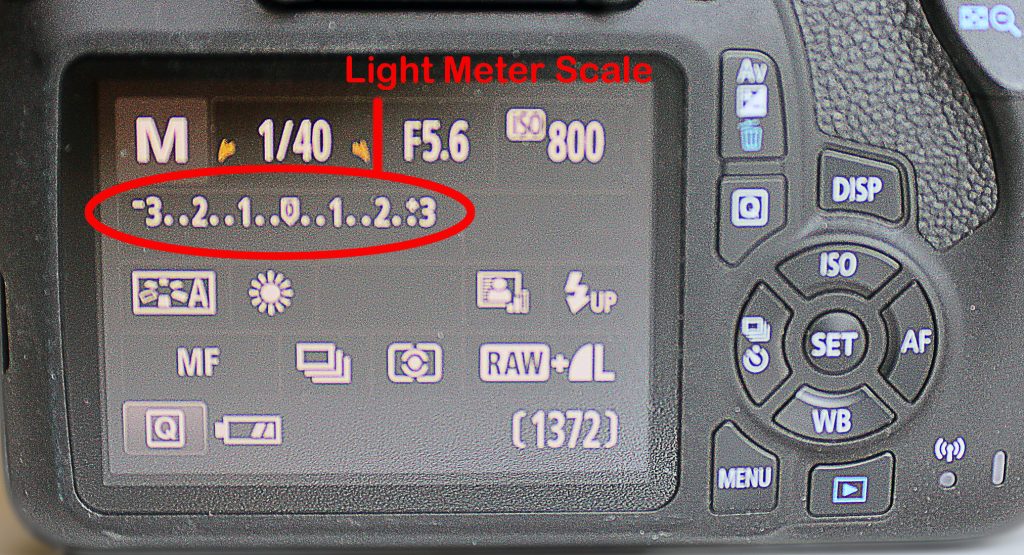
The light meter typically appears as a scale ranging from -2 to +2, with 0 representing the camera’s idea of a balanced exposure. Each number represents a “stop” of light, with -2 being two stops underexposed and +2 being two stops overexposed. Here’s how to use it:
- Set Your Aperture, Shutter Speed, and ISO based on your scene and creative goals.
- Check the Light Meter Reading: If the meter is centered at 0, the camera believes the exposure is correct for an 18% gray scene.
- Adjust Based on Your Intent:
- For high-key images, the meter may read +1 or +2. Ignore this warning and brighten the scene to achieve the desired look.
- For low-key images, the meter may read -1 or -2. Again, trust your vision and darken the exposure for dramatic shadows.
Trust Your Eye Over the Light Meter

While the light meter is a helpful tool, especially in balanced lighting, it may not give you the results you want for creative scenes. Always trust what you see on your camera’s LCD screen or viewfinder and adjust settings based on the look you want to achieve. Mastering when to rely on your instincts versus the light meter will give you greater control and allow you to produce more compelling images.
Practical Exercise: Using High ISO
Objective: Capture a well-exposed nighttime scene with minimal motion blur.
Equipment Needed:
- DSLR camera
- Tripod (optional but recommended)
Steps:
- Find Your Location: Choose a location with interesting lighting, such as a cityscape at night, a street with illuminated signs, or a park with decorative lights.
- Set Up Your Camera:
- Switch to Manual mode (“M”).
- Set your ISO to 1600 or higher.
- Adjust Shutter Speed and Aperture:
- Start with a shutter speed of 1/30s to 1/60s to minimize motion blur.
- Set the aperture to f/4 or f/5.6 to allow sufficient light.
- Compose Your Shot: Frame your scene, making sure elements of interest are in both the foreground and background.
- Take a Test Shot: Review the image on the LCD screen, zoom in to check for noise and exposure. Adjust ISO, shutter speed, or aperture as needed.
- Experiment: Try different ISO settings and compositions to see how they affect the final image.
Practical Exercise: Using Low ISO
Objective: Capture a well-exposed image in bright outdoor conditions with minimal noise.
Equipment Needed:
- DSLR camera
Steps:
- Find Your Location: Choose a bright outdoor location, such as a park, beach, or garden, on a sunny day.
- Set Up Your Camera:
- Switch to Manual mode (“M”).
- Set your ISO to 100 or 200.
- Adjust Shutter Speed and Aperture:
- Start with a faster shutter speed like 1/250s to 1/500s to avoid overexposure.
- Set the aperture to f/8 or f/11 to achieve a deep depth of field.
- Compose Your Shot: Frame your scene, ensuring that the subject is well-lit and in focus.
- Take a Test Shot: Review the image on the LCD screen, checking for exposure and clarity. Adjust ISO, shutter speed, or aperture as needed.
- Experiment: Try different ISO settings and compositions to see how they affect the final image.
Tips for Success
- Understand Noise: Higher ISO settings can introduce noise into your images, reducing quality. Always aim to use the lowest ISO that still achieves a good exposure. Compare shots with different ISO settings to understand how they affect image quality.
- Use a Tripod in Low Light: When shooting in low light, using a tripod allows you to keep the ISO low while maintaining sharpness, even with slower shutter speeds.
- Practice in Various Conditions: Experiment with ISO settings in different environments—indoors, outdoors, daytime, nighttime. This hands-on practice will help you quickly adapt to changing lighting conditions and develop a deeper understanding of how ISO, shutter speed, and aperture work together.
By mastering ISO and learning how to adjust it in Manual mode, you will gain greater control over your photography, allowing you to capture clear, well-exposed images in any lighting condition.


