11 Portraiture

Introduction to Portrait Photography
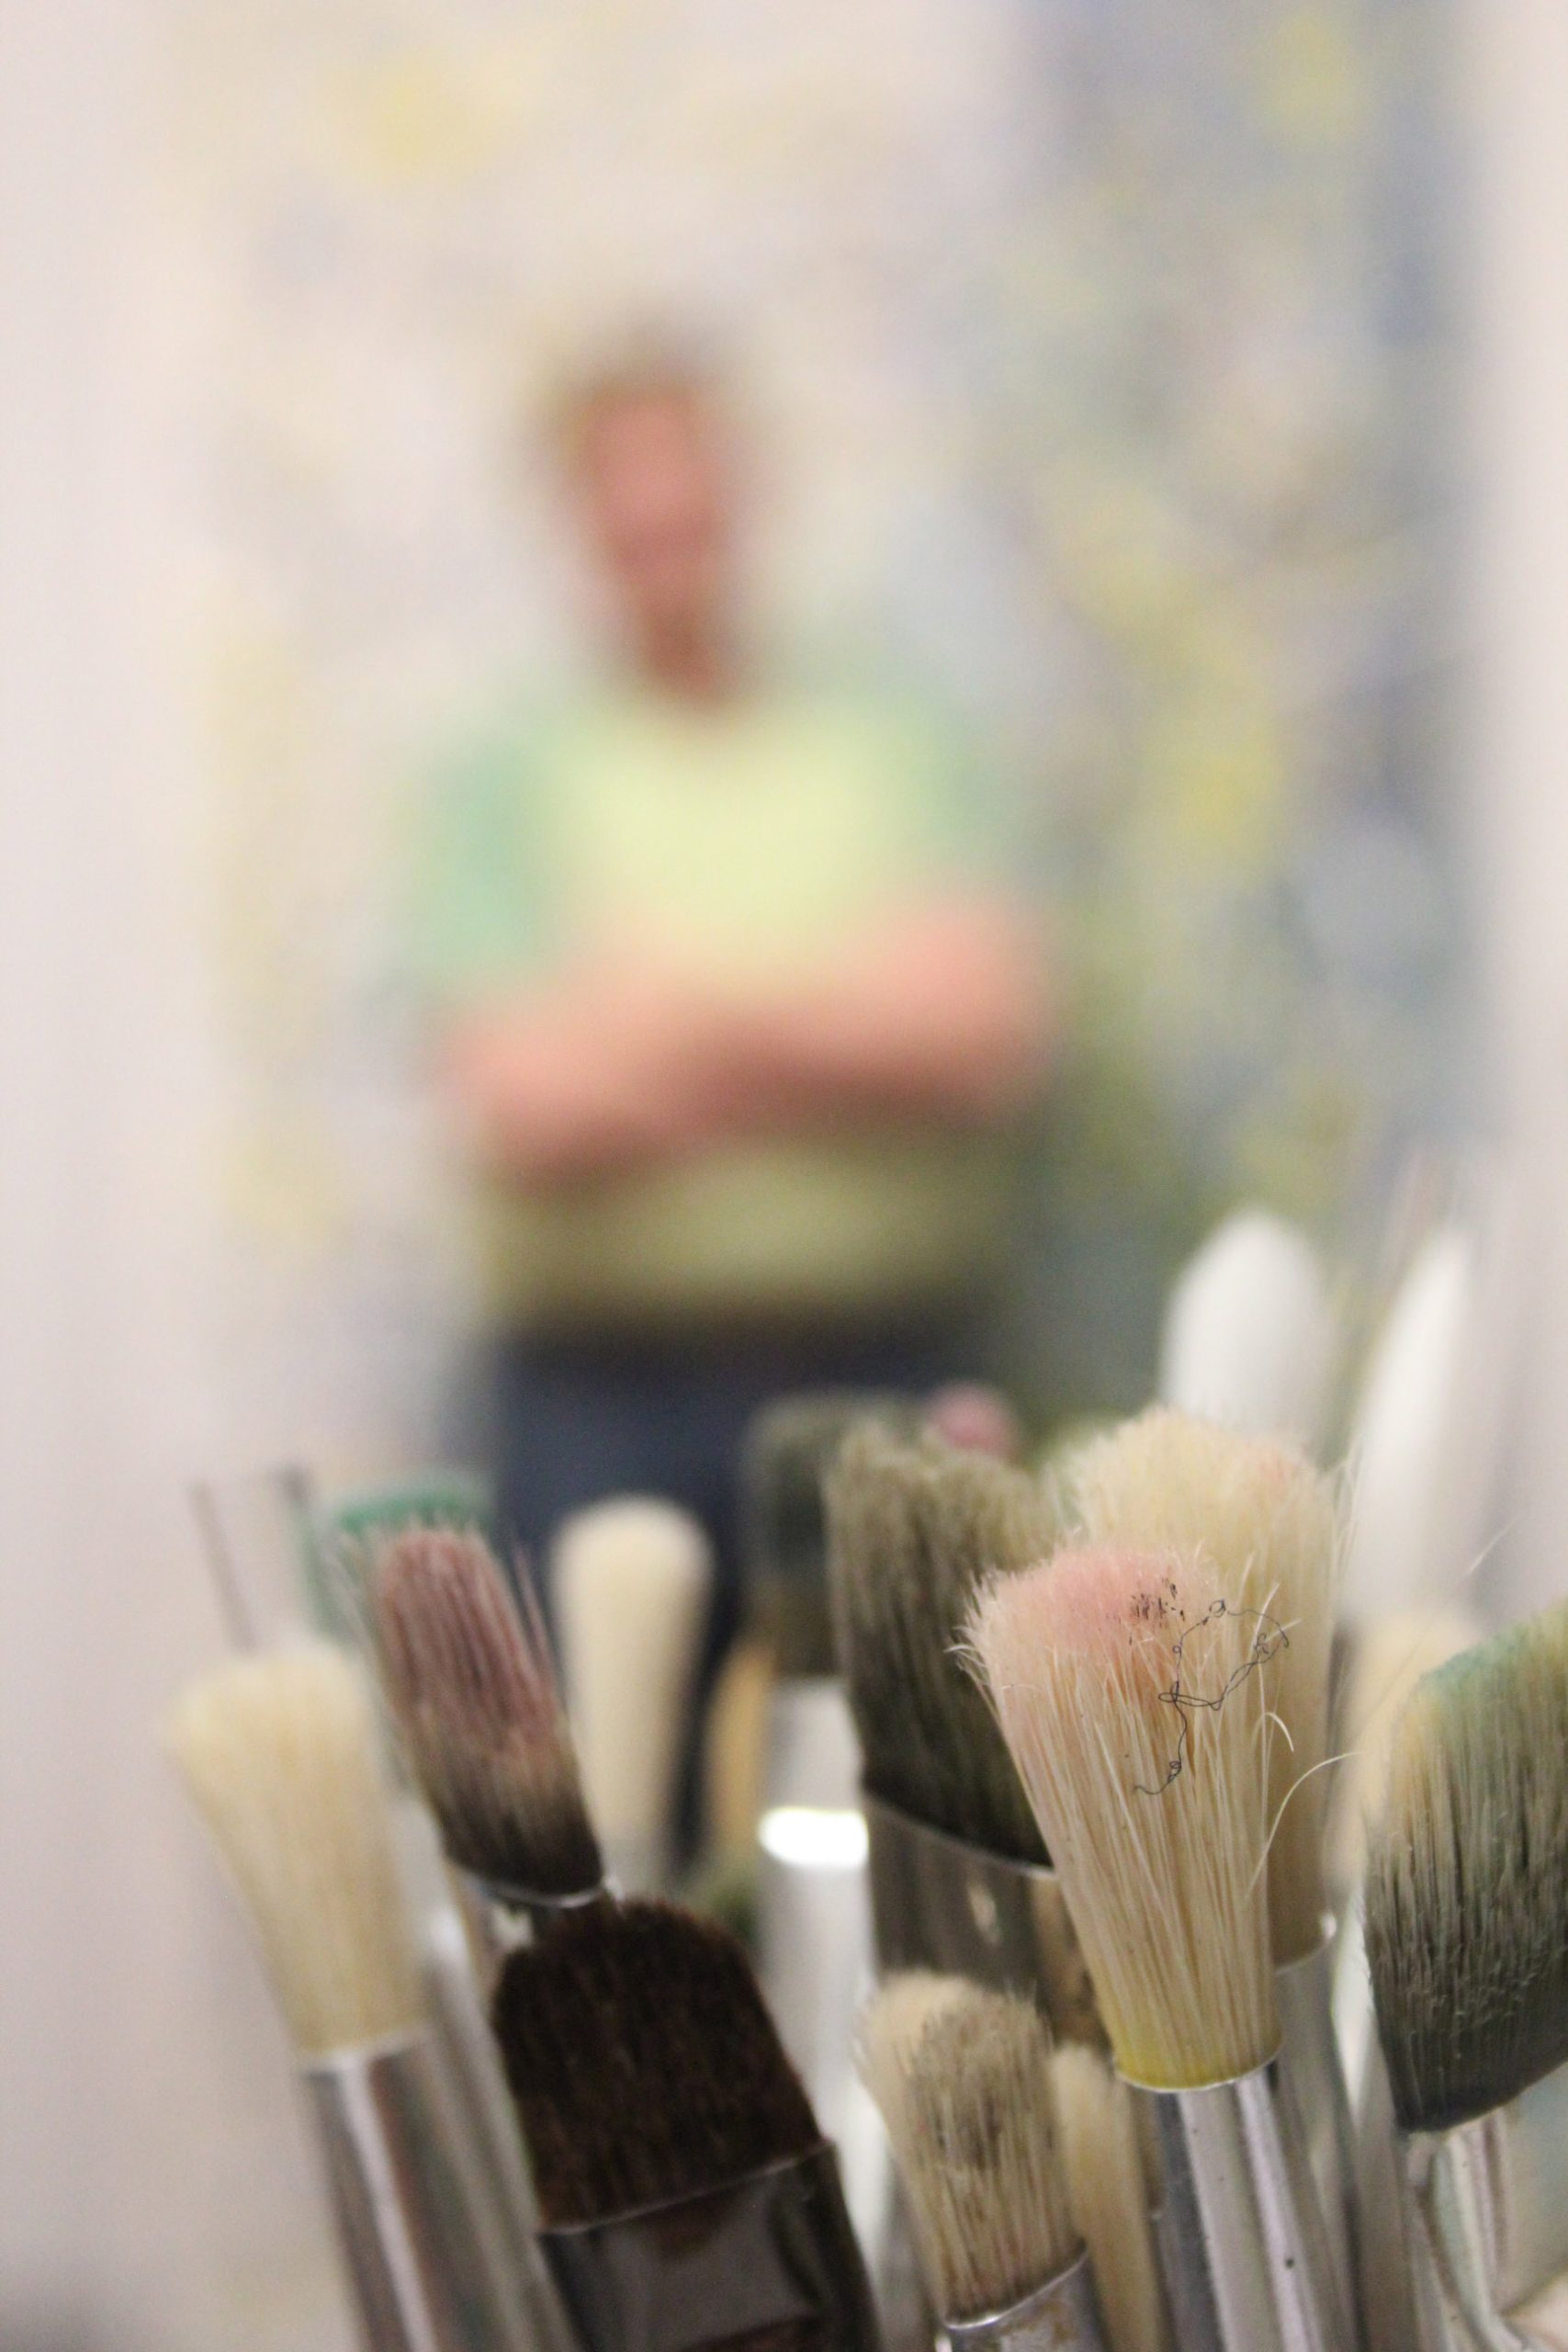
In this image, I photographed an art student in his studio. Instead of focusing on the person, I chose to highlight his brushes, which are integral to his creative process. The blurred background subtly suggests the presence of the artist and hints at a painting nearby. I believe portrait photography is about storytelling, and sometimes capturing more than just the subject’s face is key to conveying the narrative. Photo by Eric Demattos CC BY-NC-SA (Attribution Non Commercial ShareAlike)

Portrait photography is a powerful way to capture the essence of a person, telling their story through images. It requires a combination of technical skills, creative vision, and people skills to create compelling and emotionally engaging portraits. In this chapter, we will explore how to use both natural and studio lighting to illuminate your subject, discuss essential lighting tools and configurations, and provide practical exercises to help you master portrait photography.

Understanding Light in Portrait Photography

Light is a critical element in portrait photography, influencing the mood, tone, and overall quality of your images. Different types of light can have varying effects on your subject.

Warm Light vs. White Light

  • Warm Light: This type of light, often found during sunrise or sunset (golden hour), has a soft, yellowish hue. Warm light is flattering for portraits, enhancing skin tones and creating a gentle, pleasing glow.
  • White Light: Midday sunlight, which is harsher and more direct, produces a white or blueish hue. This type of light can be unflattering for portraits, causing harsh shadows and highlights that can detract from the subject’s appearance. However, white light is a great choice for reproducing natural and accurate colors. Often studio light units are calibrated to create white light. White light can be great for portraiture as long as it is not too harsh and direct, such as the example described above with the cloudless midday sun.

Tips for Using Different Types of Light

  • Warm Light: Schedule portrait sessions during golden hour for naturally flattering light. Position your subject to take advantage of the warm tones and soft shadows. Using golden hour lighting or artificial warm lights can add a warm, inviting glow to your portraits.
  • White Light: Avoid shooting portraits in the harsh midday sun. If you must shoot during this time, seek shaded areas or use diffusers to soften the light.

Experimenting with Diffuse Lights

  • Diffuse Light: Soft, diffused light can be created using overcast skies, sheer curtains, or reflectors. This type of light wraps around the subject, reducing harsh shadows and producing a smooth, even illumination.

Using Natural Light

Natural light can create beautiful and flattering portraits. It’s versatile, readily available, and can produce a range of moods depending on its quality and direction.

Tips for Using Natural Light

  • Window Light: Position your subject near a window to use soft, diffused light. Experiment with different angles and distances to see how the light shapes your subject’s face.
  • Outdoor Light: Early morning or late afternoon (golden hour) provides the best natural light for portraits. Use a portable reflector to bounce light onto your subject and reduce harsh shadows.

Exercise: Using Natural Light and Reflectors

  • Objective: Practice using natural light and reflectors to illuminate your subject.
  • Steps:
    • Find a location with good natural light, such as a window or an outdoor setting.
    • Position your subject near the light source.
    • Use a reflector to fill in shadows and balance the light on your subject’s face.
    • Experiment with different reflector angles and positions. Most reflectors have a white side, a silver side, and a golden side. Each of these is meant to reflect light in a different way. The white side is for diffuse light, the silver side is for a more dramatic spotlight, and the gold side is for warm light, such as the type of light at a sunset.

Studio Lighting

These two images, taken by Michael Cronin, demonstrate how experimenting with studio lighting, backgrounds, and monochromatic editing can produce strikingly different results. You may also notice that the portrait examples featuring facial details are of myself. This is because publishing images that clearly show a person’s facial features requires model consent, and I was the most willing model available. CC BY-SA

Studio lighting offers more control over the light and allows for creative lighting setups. Here are a variety of lighting tools for portrait photography:

Lighting Tools

  • Portable Reflector: Used outdoors to bounce light onto your subject.
  • Constant Lights: Provide continuous light in a studio setting.
  • Flash Units: Used in studios, often with modifiers like softboxes, snoots, and umbrella diffusers to shape the light.
  • Softboxes: Diffuse light to create a soft, even illumination.
  • Snoots: Focus light into a narrow beam for dramatic effects.
  • Umbrella Diffusers: Spread light broadly and softly over the subject.

Studio Lighting Configurations

A backdrop and a set of lights with diffusers provide countless options for creatively lighting a subject in portrait photography. Image by Pexels from Pixabay.
  • Key and Fill Lighting: The key light is the main light source, while the fill light softens shadows created by the key light. This setup provides a balanced and natural look.
  • Rembrandt Lighting: Creates a triangle of light under the subject’s eye, producing a classic and dramatic look.
  • Butterfly Lighting: Light is positioned above and in front of the subject, casting a butterfly-shaped shadow under the nose.
  • Side Lighting: Light is placed to the side of the subject, emphasizing texture and dimension.
  • Badger Lighting: This technique uses two light sources placed on either side and slightly behind (at 30-degree angles) the subject, creating dramatic shadows and highlights.
  • Using Colored Gels: Colored gels can be placed over lights to add color and creativity to your portraits.

Using One, Two, or Three Studio Lights

  • One Light Setup: Position a softbox or umbrella diffuser at a 45-degree angle to your subject for soft, even light.
  • Two Light Setup: Add a second light opposite the main light to fill in shadows and create balanced illumination.
  • Three Light Setup: Use a third light as a hair light or background light to add separation and depth.

Exercise: Practicing Studio Lighting

  • Objective: Experiment with one, two, and three light setups.
  • Steps:
    • Set up a single light source and position it at different angles.
    • Add a second light and experiment with placement to fill in shadows.
    • Introduce a third light for hair or background lighting.
    • Take photos at each stage to compare the effects of different lighting setups.

Making Your Subject Comfortable

Portrait photography is not just about technical skills; it also involves making your subject feel at ease. Here are some strategies:

  • Build Rapport: Spend time talking to your subject before the shoot to build a connection and make them feel comfortable.
  • Provide Clear Directions: Give gentle guidance on poses and expressions to help your subject relax and feel confident.
  • Create a Relaxed Atmosphere: Use humor, play music, or engage in light conversation to create a comfortable environment.

Practical Exercises

Exercise 1: Portraits with Lighting and Posing

This is an example of a low-key image, where most of the frame is black, and a strong, angular light highlights just the profile of my face. This high-contrast lighting technique creates a dramatic and moody effect. Photo by Eric Demattos CC BY-NC-SA (Attribution Non Commercial ShareAlike)
  • Objective: Practice lighting techniques and posing your subject.
  • Steps:
    • Set up your chosen lighting configuration (natural or studio).
    • Pose your subject in various ways to highlight different aspects of their personality.
    • Take multiple shots, adjusting the lighting and poses as needed.
    • Review the images and note how different lighting and poses affect the final result.

Exercise 2: Creative Portraits Without Showing the Face

Silhouettes and semi-translucent props, like a Japanese paper umbrella, offer a creative way to craft portraits that don’t rely solely on facial features to tell a story. These images, captured with my photography class, showcase our studio experiments using backlighting and later enhancing colors in Photoshop. Photos compilation by Eric Demattos from various student images. CC BY-NC-SA (Attribution Non Commercial ShareAlike)
  • Objective: Create a portrait that reveals something about your subject without showing their face.
  • Steps:
    • Think about the story you want to tell about your subject.
    • Consider their surroundings and other parts of their body (hands, shoes, hair, stride).
    • Compose your shot to include elements that represent your subject’s identity.
    • Experiment with different compositions and angles.
    • Be mindful of color and how it impacts your composition.

Conclusion

Mastering portrait photography involves a combination of technical knowledge and creative vision. By understanding how to use natural and studio lighting, experimenting with different lighting setups, and practicing effective communication with your subjects, you can create stunning portraits that capture the essence of the person. Remember to be mindful of color and composition, and to practice regularly to develop your skills.

License

Icon for the Creative Commons Attribution-NonCommercial-ShareAlike 4.0 International License

Learning Digital Photography Copyright © by Eric Demattos is licensed under a Creative Commons Attribution-NonCommercial-ShareAlike 4.0 International License, except where otherwise noted.

Share This Book